
Regrouting shower tiles can make an old bathroom look cleaner and help protect tiled areas from moisture, mould, and everyday wear. However, the job can fail quickly if old grout is removed carelessly, the surface is not prepared properly, or the wrong grout type is used.
This guide explains the most common mistakes homeowners make when regrouting a shower, how to avoid them, and when it is safer to call Anton’s Renovation for professional shower regrouting and bathroom repair advice in Sydney.
Key Takeaways
- Rushing the grout removal process damages tiles and creates uneven surfaces that compromise new grout adhesion.
- Skipping proper surface preparation leads to premature grout failure and water penetration behind tiles.
- Using incorrect grout types or mixing ratios results in cracking, discolouration, and reduced water resistance.
- Failing to allow adequate curing time weakens grout structure and invites moisture problems.
- Neglecting waterproofing assessments during regrouting can hide serious underlying damage requiring professional intervention.
Why Regrouting Shower Projects Often Fail
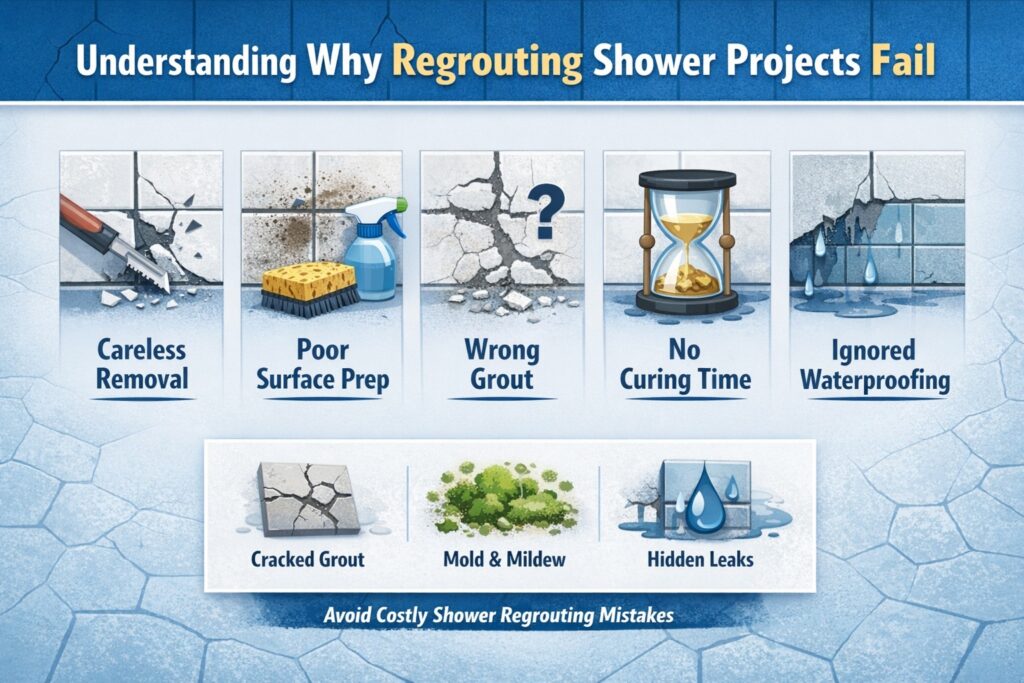
Most shower regrouting failures trace back to preparation issues rather than product quality. The grout you see on the surface depends entirely on what lies beneath it. When tiles shift slightly or water has penetrated behind them, even perfect grout application won’t last.
Temperature and humidity affect grout curing more than most people realise. Sydney’s coastal climate creates specific challenges that differ from inland conditions.
Many DIY attempts also underestimate the physical effort involved. Removing old grout from an entire shower enclosure takes hours of careful work, and fatigue leads to shortcuts that compromise results.
Regrouting shower tiles involves removing damaged or mouldy grout, cleaning and drying the grout joints, applying fresh grout, allowing it to cure properly, and sealing it if required. If the shower has loose tiles, recurring mould, leaks, or signs of waterproofing failure, regrouting alone may not be enough and a professional assessment is recommended.
1. Removing Old Grout Too Quickly When Regrouting a Shower
Removing old grout too quickly or carelessly is one of the main reasons regrouting projects fail. This stage creates the base for the entire job, so rushing it can lead to chipped tile edges, uneven grout lines, and a poor final finish. While fast removal may seem efficient at first, it often causes damage that makes it harder for new grout to bond properly and look professional.
Proper grout removal is essential because old grout can trap moisture, soap residue, and mould deep within its surface. If even a thin layer remains, the new grout may stick to contaminated material instead of clean tile edges, which weakens the bond and causes early failure under regular shower use. It is also important to remove grout to the correct depth, usually around 3 to 5 mm, so the new material can anchor securely and withstand daily water exposure.
Using the right technique helps protect your tiles and improves the overall result. A proper grout saw, matched to the width of the grout line, allows for safer and more controlled removal than improvised tools. Working in short strokes, testing your method in a hidden corner, and taking regular breaks can prevent costly mistakes. However, if tiles feel loose or the home has older, delicate tilework, professional help may be the safer option, as these situations can point to deeper structural or waterproofing issues.
2. Poor Surface Preparation Before Regrouting Shower Tiles
Skipping surface preparation is another common reason regrouting jobs fail. After old grout is removed, many people assume the area is ready for new grout straight away, but dust, oil residue, and fine debris can stop proper adhesion. Even the tile edges need to be checked carefully, as chips, cracks, or damaged glaze can affect how well the new grout performs.
Thorough cleaning is a critical part of preparation before applying new grout. Grout lines should be vacuumed carefully, then wiped with a damp cloth to remove fine particles left behind. Surfaces must be allowed to dry fully, and any stubborn soap scum or mineral deposits should be treated properly, using gentle methods that will not damage the tile material.
It is also important to check for hidden moisture or structural issues before regrouting. Damp spots, loose-sounding tiles, and cracks where walls meet the shower base may point to leaks, movement, or waterproofing failure underneath the surface. In these cases, regrouting alone will not solve the problem, and a professional assessment may be necessary to prevent more serious water damage later on.
3. Choosing the Wrong Grout for Shower Regrouting
Choosing the right grout is one of the most important parts of a successful shower regrouting job. Many homeowners assume all grout works the same, but different products are designed for different joint widths, moisture levels, and performance needs. Using the wrong grout type or mixing it poorly can lead to cracking, staining, weak joints, and early failure.
| Grout Type | Best For | Water Resistance | Sealing Required |
|---|---|---|---|
| Cement-based (unsanded) | Narrow joints under 3mm | Moderate | Yes, after curing |
| Cement-based (sanded) | Joints 3mm and wider | Moderate | Yes, after curing |
| Epoxy | All shower areas and high-moisture zones | Excellent | No |
| Pre-mixed | Small repairs only | Poor to moderate | Usually yes |
Cement-based grout remains a common choice because it is more affordable and easier to apply, especially for DIY projects. Epoxy grout performs better in constantly wet areas because it resists water, stains, and mould without needing sealer, although it is harder to work with and sets faster. No matter which grout you choose, following the correct mixing ratio and application instructions is essential if you want a durable, professional-looking finish.
4. Not Allowing Enough Curing Time After Regrouting a Shower
Regrouting a shower is not just about applying fresh grout correctly. Giving the grout enough time to cure is what allows it to harden properly and develop the strength needed to handle daily moisture exposure. If water reaches the grout too soon, it can weaken the joints, wash away particles, and lead to early failure.
Although grout may look dry on the surface within a few hours, the material underneath often remains damp and fragile. Standard cement-based grout usually needs at least 24 to 48 hours before light water exposure and around 72 hours before regular shower use, while epoxy grout cures faster but still needs protection. In Sydney, humidity can slow the process even more, so bathrooms in coastal areas may need longer drying times before the shower is used again.
During the curing period, the shower should stay dry and the bathroom should remain gently ventilated without forcing air directly onto the grout. You can check if the grout is ready by looking for even colour across the joints and making sure it feels firm rather than soft or crumbly. Once fully cured, cement-based grout should also be sealed properly to help protect it from moisture, stains, and everyday bathroom wear.
5. Ignoring Waterproofing Issues Before Regrouting Shower Areas
Regrouting can improve the appearance of a shower, but it will not solve problems caused by failed waterproofing or structural damage underneath the tiles. In many cases, recurring grout issues are only the visible sign of a deeper moisture problem developing behind the surface. If water has already penetrated the wall or floor system, fresh grout may only provide a temporary cosmetic improvement while the hidden damage continues to spread.
There are several warning signs that suggest your shower needs more than a simple regrouting job. Persistent musty smells, repeated grout failure in the same areas, discolouration on nearby walls, spongy tiles, or cracks in corners often point to trapped moisture, movement, or damaged substrates. When these symptoms appear, DIY regrouting is usually not enough because the real issue lies in the waterproofing membrane, tile backing, or structure behind the enclosure.
A professional assessment can help determine whether regrouting is still appropriate or whether more extensive repair work is needed. Licensed bathroom renovators and plumbers can use tools such as moisture meters and inspection cameras to check conditions behind tiles without unnecessary demolition. Addressing leaking shower fixtures, water pressure issues, or planned fixture upgrades at the same time also improves the chances of long-term regrouting success and helps prevent damage to newly finished surfaces.
Getting Professional Help for Your Shower Renovation
Some shower regrouting jobs are manageable for confident DIY homeowners, but others require professional expertise from the start. Knowing when to call in a specialist can save you from wasting time and money on temporary fixes that don’t address the root cause. That’s where Anton’s Renovation comes in—providing expert guidance and reliable solutions tailored to your bathroom’s condition.
Professional regrouting goes beyond replacing old grout lines. At Anton’s Renovation, our team conducts a full assessment of your shower, checking tile stability, waterproofing integrity, and fixture performance to ensure regrouting is the right solution. We use high-quality materials, follow proper curing and sealing processes, and deliver workmanship backed by experience—so you get long-lasting results, not repeat problems.
Sydney homeowners trust Anton’s Renovation for honest advice, transparent pricing, and dependable service across all types of properties. Whether you’re dealing with recurring grout issues or planning a full bathroom upgrade, our team is ready to help you achieve a durable, professional finish. Get in touch today to book your assessment and take the first step toward a better, longer-lasting shower renovation.
Maintaining Your Shower After Regrouting
Proper maintenance plays a big role in how long your newly regrouted shower will last. Good habits help prevent soap scum, mineral deposits, and mould from breaking down the grout before its time. In Sydney’s humid conditions, a little regular care goes a long way in keeping your shower clean, dry, and in good condition.
- Squeegee shower walls after each use to remove standing water and reduce ongoing moisture exposure.
- Keep the bathroom ventilated during and after showers by running the exhaust fan for at least 20 minutes or opening a window where possible.
- Clean shower surfaces weekly with pH-neutral cleaners to avoid damaging grout and tile finishes with harsh chemicals.
- Reseal cement-based grout annually or according to product instructions to help protect against water penetration and staining.
- Fix small grout cracks early before they spread and turn into a larger repair job.
- Watch for leaking taps, shower heads, or fixtures that can keep grout constantly damp and speed up deterioration.
- Look out for signs of future regrouting needs, such as widespread cracking, stubborn discolouration, or moisture getting behind tiles.
With the right maintenance routine, properly installed grout can often last 10 to 15 years before replacement is needed. Staying proactive helps you avoid more serious tile damage and reduces the risk of hidden moisture problems developing behind the surface. A few minutes of care each week can protect the finish of your shower and save you from costly repairs later.
Conclusion
Avoiding these five common mistakes transforms regrouting from a frustrating chore into a successful home improvement project. Whether you tackle the work yourself or bring in professionals, understanding these pitfalls helps you achieve results that last. Your shower deserves attention to detail that goes beyond surface appearances, addressing the preparation, products, and patience that create truly durable outcomes for your Sydney home.
Antons Renovation brings over 15 years of bathroom renovation expertise to every Sydney project. Our licensed team ensures proper waterproofing and tiling techniques that last. Get started with a trusted local specialist today.
Related Articles
- Top 5 Benefits of Professional Regrouting for Your Home
- Resealing Shower: When and Why Homeowners Should Reseal Their Shower
- Why Tile Regrouting is Essential for Lasting Home Value
FAQs
What Is The Process Of Regrouting A Shower?
The process of regrouting a shower involves removing old grout, cleaning the tile surfaces, applying new grout, and sealing it for protection. At Antons Renovation, we ensure meticulous attention to detail during this process, leveraging our 15 years of experience to achieve a flawless finish.
How Often Should You Regrout A Shower?
Typically, you should consider regrouting your shower every 5 to 10 years, depending on wear and tear, exposure to moisture, and maintenance practices. Our skilled team can assess your shower’s condition and recommend the best course of action to maintain its integrity.
Can You Regrout Over Old Grout?
While it’s technically possible to regrout over old grout, it’s not recommended as it can lead to adhesion issues and a less durable finish. At Antons Renovation, we prioritize doing the job right by removing old grout before applying new, ensuring long-lasting results.
What Tools Do I Need To Regrout A Shower?
The essential tools for regrouting a shower include a grout saw or scraper, sponge, bucket, mixing paddle, and a grout float. Our experienced team brings all the necessary tools and expertise to handle your regrouting project efficiently and effectively.
How Long Does It Take To Regrout A Shower?
Regrouting a shower typically takes a few hours to a day, depending on the size of the area and the extent of the work needed. With our streamlined process at Antons Renovation, we aim for minimal disruption and can often complete the task swiftly without compromising quality.
Is regrouting shower tiles worth it?
Yes, regrouting shower tiles can be worth it if the tiles are still stable and the waterproofing has not failed. It can refresh the appearance of the shower, reduce mould-prone gaps, and help protect grout joints from further wear.
Can I do shower regrouting myself?
You can regrout a shower yourself if the issue is limited to surface grout damage and the tiles are still firm. If there are loose tiles, leaks, musty smells, or repeated grout failure, it is safer to get a professional assessment first.
How long does shower regrouting last?
Shower regrouting can last several years when the old grout is removed properly, the surface is prepared well, and the new grout is allowed to cure correctly. Regular cleaning, ventilation, and sealing also help extend its lifespan.
Do I need to seal grout after regrouting a shower?
Cement-based grout usually needs sealing after it has cured, while epoxy grout often does not require sealing. Always follow the grout product instructions or ask a professional if you are unsure which material was used.
When is regrouting a shower not enough?
Regrouting may not be enough if the shower has failed waterproofing, loose tiles, cracked substrates, recurring leaks, or moisture damage behind the wall. In these cases, bathroom repair or renovation work may be needed before new grout will last.
