
Cracked grout lines, mildew stains, and water seeping behind tiles are clear signs your shower needs attention. Many Sydney homeowners face the decision: tackle DIY regrouting shower work themselves or call in licensed professionals. The choice affects your budget, timeline, and how long the results last.
This article compares both approaches in detail. You’ll learn what DIY regrouting involves, when professional help makes sense, and how to decide based on your skill level, available time, and the condition of your shower.
Key Takeaways
- DIY shower regrouting can save money upfront but requires specific tools, materials, and careful preparation.
- Professional regrouting typically ranges from $600 to $2,500 depending on shower size and grout condition.
- Improper DIY work can lead to shower leak repair issues, mould growth, and costly water damage.
- Licensed renovators ensure compliance with Australian building standards and proper waterproofing.
- Complex problems like leaking shower head fixtures or strip drain shower systems often need expert diagnosis.
Understanding DIY Regrouting Shower Work
Regrouting means removing old, damaged grout and replacing it with fresh material. The process sounds simple but demands attention to detail. You need to clean out every joint completely, mix grout to the right consistency, and apply it evenly without leaving voids.
Most DIY guides recommend starting with a grout saw or oscillating tool to remove old grout. You’ll vacuum the dust, wipe the tiles clean, and let everything dry before applying new grout. After the grout cures for 48 to 72 hours, you seal it to resist moisture and mildew.
Tools and Materials You’ll Need
A basic DIY regrouting shower project requires several specialised items. Missing even one can compromise your results or extend the timeline significantly.
- Grout saw or oscillating multi-tool with grout removal blade
- Vacuum cleaner with hose attachment for dust removal
- Grout float and rubber squeegee for application
- Sponges, buckets, and clean water for cleanup
- Grout mix (sanded or unsanded depending on joint width)
- Grout sealer to protect finished joints
- Safety glasses, dust mask, and rubber gloves
Step-by-Step DIY Process
Following a clear sequence helps avoid common mistakes. Each step builds on the previous one, so skipping or rushing any stage can weaken the final result.
- Remove Old Grout: Use a grout saw to cut along each joint, working carefully to avoid chipping tiles. An oscillating tool speeds the process but increases the risk of tile damage if you’re not experienced.
- Clean and Dry: Vacuum all dust and debris from the joints. Wipe tiles with a damp cloth and let the area dry completely. Any moisture left in the joints prevents proper bonding.
- Mix Grout: Combine grout powder with water to a peanut-butter-like consistency. Let the mixture slake for 5 to 10 minutes, then stir again before use. Incorrect mixing leads to weak or crumbly grout.
- Apply Grout: Hold the grout float at a 45-degree angle and press grout firmly into each joint. Work in small sections to keep the grout workable. Remove excess with the float’s edge.
- Clean Tiles: After 15 to 20 minutes, wipe tiles with a damp sponge in a circular motion. Rinse the sponge frequently. Avoid pulling grout from the joints.
- Cure and Seal: Keep the shower dry for at least 48 hours. Once cured, apply grout sealer according to the manufacturer’s instructions. This step is critical for long-term moisture resistance.
When DIY Regrouting Shower Makes Sense
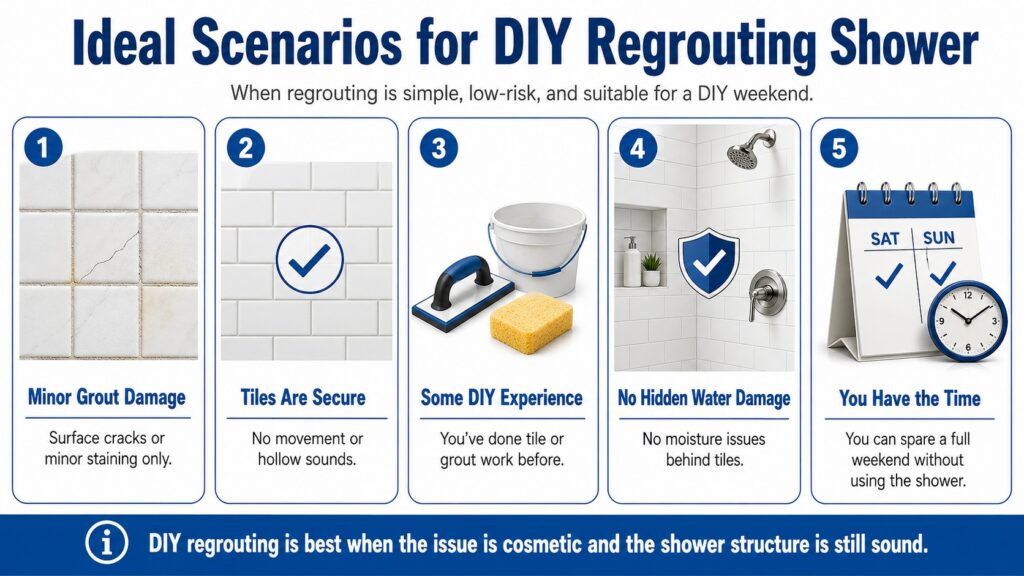
Some situations suit a DIY approach. If you have basic home improvement skills, the right tools, and a straightforward project, you might save money and gain satisfaction from the work.
Small showers with minimal grout damage are ideal candidates. If only a few joints show cracking or discolouration, and the tiles themselves are sound, a DIY fix can extend the life of your shower without major expense.
Ideal Scenarios for DIY
Consider handling the work yourself if these conditions apply. Each factor reduces the complexity and risk involved.
- Grout damage is limited to surface cracks or minor staining
- Tiles are firmly attached with no movement or hollow sounds
- You have prior experience with tile or grout work
- No signs of water damage behind tiles or around fixtures
- You can dedicate a full weekend without needing the shower
Potential Risks and Challenges
Even straightforward DIY regrouting shower projects carry risks. Recognising these helps you decide whether to proceed or call a professional.
- Tile Damage: Aggressive grout removal can chip or crack tiles, especially older ceramic or delicate mosaics. Replacing broken tiles adds cost and complexity.
- Incomplete Removal: Leaving old grout in the joints prevents the new grout from bonding properly. Weak spots fail quickly, leading to water penetration.
- Incorrect Grout Type: Using sanded grout in narrow joints or unsanded in wide ones affects durability. The wrong choice can crack or crumble within months.
- Poor Sealing: Skipping the sealer or applying it too soon allows moisture to seep in. This leads to mildew growth and potential shower leak repair needs down the line.
- Hidden Water Damage: If grout failure has already allowed water behind the tiles, regrouting alone won’t fix the problem. You might be covering up structural issues that will worsen over time.
Benefits of Hiring a Professional for Shower Regrouting
Licensed renovators bring expertise, proper tools, and compliance knowledge to every project. They spot underlying issues that DIY approaches often miss, saving you from costly repairs later.
Professional teams work faster and deliver consistent results. They understand how different tile types, grout formulations, and sealers interact. This knowledge ensures your shower stays watertight and looks great for years.
1. Accurate Diagnosis of Underlying Issues
Professionals inspect beyond the grout lines. They check for tile movement, water damage, and failing waterproofing membranes. If they find a leaking shower head or faulty strip drain shower system, they address it before regrouting.
2. Compliance with Australian Building Standards
Waterproofing and tile work in wet areas must meet specific codes. Licensed contractors ensure all work complies with NSW Fair Trading requirements and relevant Australian Standards. This protects your home and maintains insurance coverage.
3. Access to Quality Materials and Tools
Professionals use commercial-grade grout, sealers, and application tools. These materials outperform retail products in durability and moisture resistance. They also have specialised equipment for safe, efficient grout removal.
4. Time Savings and Convenience
A professional team completes most regrouting jobs in one to two days. You avoid the learning curve, tool purchases, and trial-and-error that extend DIY timelines. Your shower is back in service faster with less disruption.
5. Warranty and Accountability
Reputable renovators back their work with service guarantees. If grout fails or issues arise, they return to fix it at no extra charge. DIY work offers no such protection.
6. Comprehensive Solutions for Complex Problems
When regrouting reveals bigger issues like cracked tiles, damaged waterproofing, or plumbing leaks, professionals handle the full scope. We at Antons Renovation often integrate regrouting into broader bathroom upgrades, addressing everything from shower power improvements to complete fixture replacements.
Comparing DIY Regrouting Shower vs Professional Services
Choosing between DIY shower regrouting and hiring a professional depends on your budget, skill level, available time, and the condition of the shower itself. While DIY regrouting can cost less upfront, it also comes with a higher risk of mistakes, missed damage, and uneven results if the work is not done properly. A side-by-side comparison makes it easier to understand the trade-offs and decide which option best suits your bathroom and confidence level.
| Factor | DIY Regrouting | Professional Regrouting |
|---|---|---|
| Upfront Cost | $100–$300 for tools and materials | $600–$2,500 depending on scope |
| Time Required | 1–3 days plus curing time | 1–2 days including curing |
| Skill Level | Moderate to advanced home improvement skills | No homeowner skill required |
| Risk of Errors | High if inexperienced and may lead to tile damage or leaks | Low because licensed teams follow proven methods |
| Warranty | None because you handle any failures yourself | Service guarantee and compliance documentation |
| Problem Detection | Usually limited to visible grout issues | More thorough inspection for hidden damage |
The right choice often comes down to whether the shower only needs a simple grout refresh or whether there may be deeper issues behind the tiles. DIY regrouting can work for confident homeowners handling small and straightforward jobs, while professional services offer more reliability when waterproofing, hidden damage, or long-term performance matter. By comparing both approaches carefully, homeowners can choose the option that best matches their budget, expectations, and risk tolerance.
Common Shower Issues That Need Professional Attention
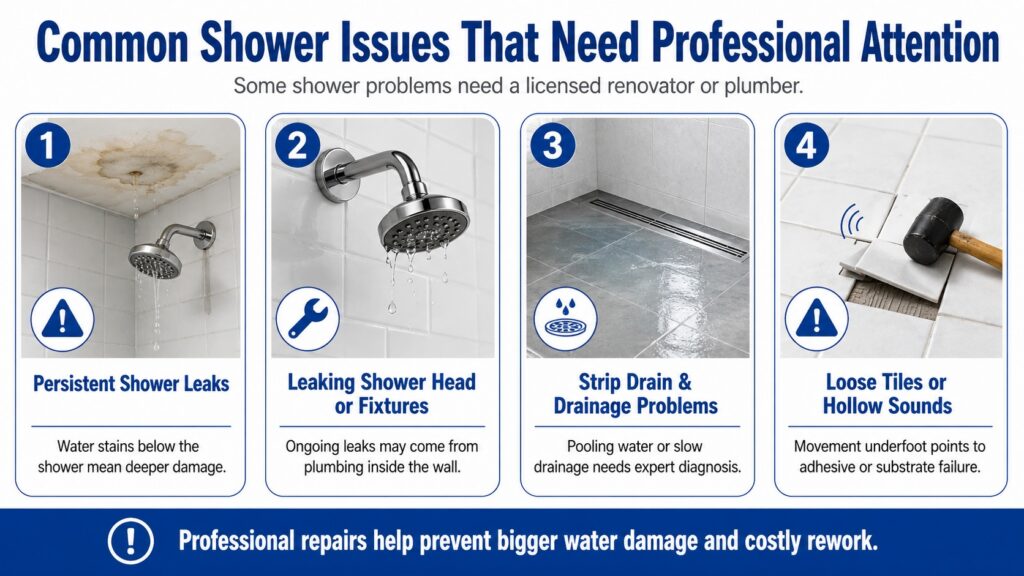
Some problems go beyond simple grout replacement. Attempting DIY fixes in these cases often makes the situation worse and increases repair expenses.
Recognising when to call a licensed renovator protects your investment and prevents water damage that can spread to walls, floors, and even the structure below.
Persistent Shower Leak Repair Needs
If water stains appear on ceilings or walls below your shower, the issue extends beyond grout. Failed waterproofing membranes or cracked tiles allow water to penetrate. Regrouting alone won’t stop the leak.
Professionals remove affected tiles, inspect the waterproofing layer, and repair or replace it according to Australian Standards. They then re-tile and regrout, ensuring a watertight seal.
Leaking Shower Head or Fixture Problems
A leaking shower head often stems from worn washers, damaged seals, or loose connections. While some DIY fixes are possible, persistent leaks may indicate plumbing issues inside the wall. Professionals diagnose the root cause and replace faulty components correctly.
Strip Drain Shower Systems and Drainage Issues
Modern strip drain shower designs require precise installation and waterproofing. If water pools or drains slowly, the problem may involve the drain assembly, incorrect floor slope, or blocked pipework. Licensed plumbers and renovators have the tools and knowledge to fix these issues without guessing.
Tile Movement or Hollow Sounds
Tiles that shift underfoot or sound hollow when tapped indicate adhesive failure or substrate damage. Regrouting won’t stabilise loose tiles. Professionals remove and re-set tiles properly, checking the substrate and waterproofing before finishing.
How Antons Renovation Approaches Shower Regrouting and Upgrades
We specialise in complete bathroom renovations rather than standalone regrouting services. When grout issues arise, they often signal broader problems that benefit from a comprehensive solution.
Our team conducts a thorough onsite assessment. We check tile integrity, waterproofing, fixtures, and drainage. If regrouting forms part of a larger upgrade, we integrate it seamlessly into the project scope, ensuring every element meets current standards.
From consultation through to final handover, we maintain clear communication. You’ll know what to expect at each stage, from material selection to curing times. Our streamlined process minimises disruption, and we respect your home by protecting floors, fixtures, and surrounding areas.
Making the Right Choice for Your Sydney Home
Your decision hinges on the scope of the problem, your skill level, and your long-term goals. If grout damage is minor and you’re confident in your abilities, DIY might work. But if you notice leaks, tile movement, or extensive cracking, professional help is the safer choice.
Consider the value of your time and the cost of potential mistakes. A botched DIY job can lead to water damage that far exceeds the expense of hiring a licensed team from the start.
Questions to Ask Yourself
Reflect on these points before starting any DIY regrouting shower project. Honest answers guide you toward the best path forward.
- Do I have experience with tile or grout work, or will this be my first attempt?
- Can I dedicate an entire weekend without needing the shower, plus curing time?
- Are there signs of water damage, tile movement, or fixture leaks beyond grout issues?
- Do I own or can I afford to buy the necessary tools and materials?
- Am I comfortable with the risk of tile damage or incomplete repairs?
- Would I prefer a warranty-backed solution with guaranteed compliance?
When to Contact a Licensed Renovator
If any of the following apply, reach out to a professional team. Early intervention prevents minor issues from escalating into major repairs.
- Water stains on walls or ceilings below the shower
- Tiles that move or sound hollow when tapped
- Persistent mildew or mould despite regular cleaning
- Leaking shower head or fixture problems that don’t resolve with simple fixes
- Desire to upgrade fixtures, layout, or drainage systems
- Uncertainty about waterproofing compliance or building codes
We at Antons Renovation work with homeowners across Sydney, from the Inner West to the Hills District and beyond. Our licensed team handles everything from minor bathroom touch-ups to full-scale renovations, always with transparent communication and quality materials. Call 0466 334 065 or request a free onsite quote to discuss your shower and bathroom needs.
Conclusion
DIY regrouting shower projects can work for small, straightforward repairs if you have the skills and tools. Professional services offer speed, compliance, and long-term reliability, especially when underlying issues exist. Weigh your situation carefully, and choose the approach that protects your home and delivers lasting results.
Antons Renovation brings over 15 years of bathroom renovation expertise to Sydney homeowners. Our licensed team ensures waterproofing and tiling meet Australian standards every time. Get started with a trusted professional today.
Related Articles
- DIY Shower Repair Tips Every Homeowner Should Know
- Top 5 DIY Bathroom Renovation Tips for Busy Homeowners
- 5 Common DIY Bathroom Waterproofing Mistakes to Avoid
FAQs
What Tools Do I Need For DIY Regrouting A Shower?
For DIY regrouting, you’ll need a grout removal tool or a utility knife, a grout float, a sponge, a bucket, and new grout. If you’re unsure about the process, our experienced team at Antons Renovation can guide you through the best practices for a professional finish.
How Do I Remove Old Grout From A Shower?
To remove old grout, use a grout removal tool or a utility knife to carefully scrape out the grout between tiles. It’s important to take your time to avoid damaging the tiles. If you’d prefer a hassle-free solution, our skilled professionals can handle this task efficiently.
What Type Of Grout Is Best For Shower Regrouting?
For shower regrouting, a polymer-modified grout or epoxy grout is often recommended due to their water resistance and durability. Our team at Antons Renovation can help you select the best option based on your specific shower conditions.
How Long Does It Take To Regrout A Shower?
The time it takes to regrout a shower can vary, but typically it ranges from a few hours to a day, depending on the size of the shower and the extent of grout removal. If you prefer a quick and expertly managed process, we can complete the job with minimal disruption.
Can I Regrout Over Existing Grout In My Shower?
Regrouting over existing grout is not recommended as it may not adhere properly and could lead to further issues. For the best results, our team suggests removing the old grout first to ensure a solid foundation for the new grout.
